
Friday, December 28, 2012
Free ebook... Today only! How to downsize a house full into an RV
This book looks great.... Chock full of advice on how to get rid of clutter and simplify your life. Definitely worth a peek if you are considering full timing it, or just want to declutter! Check it out here!
Great apps for keeping busy on the road
While on the hunt for apps to keep our (not so) little ones busy on our disastrous road trip (more on that later), I came across an absolutely fabulous and FREE app from gorving.com.
It's called Get Away Games and is available for iPhone / iPad and Android devices (so loving our kids' new Nexus 7s! They make the iPad look like a toy!)
Get Away Games has four different games you can play: license plate bingo, road trip I spy, mad libs (the best free mad lib game I've found), and the ABC game.
All games we remember playing as kids on road trips in low tech form!
My favorite part of this app is that whenever you turn it on, it shows a different RV driving up! Way cute!
Friday, December 7, 2012
Elf on the Shelf Adventures

He has been up to some adventures, let me tell you!
So far, this year, he has:
- Slept with our new kittens (mama cat seemed quite suspicious of the intruder!)
- Made a hammock out or unmentionables
- Worn the "We Will Get Along Shirt" to let the kiddos know that he knows they were misbehaving
- Snuggled under the tree and read Tuck Everlasting, which Hunter is reading for Roadschool
- Had a hot tub party with the Barbies
- Lined up all the red and green Hot Wheels
- Played Giant Backyard Scrabble
- Made duck tape bow tie, bracelets, and legwarmers for himself, as well as a Duct Tape Tree for the wall
- Hidden in candy dishes and the washer
- Made a candy cane swing
Do YOU have an Elf on the Shelf? What has he been up to? Share in the comments or post pics to our facebook page!
Crazy Elf on the Shelf Makes a Hammock

Really, Delfie?
Love that hammock! And a sock for a blanket, too!
Guess I should be glad he didn't use underwear!
Elf on the Shelf plays Handmade Backyard Giant Scrabble

We decided we'd just play based on number of letters in words, so we omitted the whole points for each letter thing.
Want to make your own? You may want to know what the letter distribution is:
A-9 B-2 C-2 D-4 E-12 F-2 G-3 H-2 I-9 J-1 K-1 L-4 M-2 N-6
Planning on making your own? We' d love to see them. Post pics on our Facebook page, or leave us a comment and we'll come check out your page!
Creative EASY Christmas Countdown Chain Tree

It's very simple, almost self- explanatory! You will need: 16 strips of green paper (mine was about 9 x 1 inches), 1 strip yellow, 5 strips red, and 3 strips brown.
Starting at the top, make 1 yellow loop.
Attach to it 1 green.
Hang 2 greens off that loop.
Secure the 2 greens with a horizontal green loop.
Off each of the 2 green vertical loops (that are secured with a horizontal loop), hang 1 red and green loop.
Attach 1 green loop to each green loop above it. Attach both reds above to 1 green loop (there are 3 green loops in this row).
Secure the 3 greens with 2 horizontal green loops.
Hang 1 red and 1 green from each of the green loops above.
Hook the center 2 red and green loops together with a brown loop (2 browns in this row).
Secure the 2 browns with a horizontal brown loop.
That's it! It took me longer to type it than it does to make it!
This model has 25 loops (I like to have one left on Christmas day.) You can also make a smaller version if you're a little late in getting your countdown up!
Tuesday, November 20, 2012
Turkey Hunt Part 2
So, you've read about our Tom Turkey Hunt. Total blast! Since my kiddos are older, I hid the turkeys in somewhat difficult locations. I figured it would be fun to see what an eagle eye my readers have. Can you find the turkeys in the pictures below?


Thanksgiving Fun: Tom Turkey Hunt
Everyone loves Easter Egg Hunts, right? Well, this should be right up your alley then! Why should Easter get to have all the fun? Try this Tom Turkey hunt with your kiddos (or grown-ups too)- fun guaranteed!

This is an easy activity that requires little materials and preparation. Perfect for camping!
You really need to hold your Tom Turkey hunt outside, where Tom can blend in with all the leaves and fall foliage. Plus, anything done outside is just funner! Am I right??
 You will need turkey cutouts to hide. I used 35 for two older kids. You may use more or less depending on your ages and numbers. You can print my template b/w and use it as a pattern to trace around on brown construction paper, or you can print it in color.
You could also color in a turkey printable like these, or use some cutouts from the dollar store, Michael's, etc. Whatever floats your boat!
I printed mine in two colors of brown paper to make it a challenge. If you want to make it easier, make your turkeys red, yellow, or orange.
No turkeys? No problem! Paint some paper plates, or use feathers, or buttons, or coloring book pages, or make some out of Play-doh! (I have all these things in my camper. Do you, or am I just a weirdo?)
 Basically, this is like an Easter Egg Hunt- with Turkeys. Hide your turkeys wherever you desire. You can be as easy or as difficult as you want, based on the ages of your players.

My kiddos had a blast with this! It was so much fun, we plan on taking our Turkeys to Thanksgiving dinner to hide with the adults.
 This would be the perfect post- dinner "work off all that food" activity!
I'd love to know if you try this with your fam, and what they think of it!

This is an easy activity that requires little materials and preparation. Perfect for camping!
You really need to hold your Tom Turkey hunt outside, where Tom can blend in with all the leaves and fall foliage. Plus, anything done outside is just funner! Am I right??

You could also color in a turkey printable like these, or use some cutouts from the dollar store, Michael's, etc. Whatever floats your boat!
I printed mine in two colors of brown paper to make it a challenge. If you want to make it easier, make your turkeys red, yellow, or orange.
No turkeys? No problem! Paint some paper plates, or use feathers, or buttons, or coloring book pages, or make some out of Play-doh! (I have all these things in my camper. Do you, or am I just a weirdo?)


My kiddos had a blast with this! It was so much fun, we plan on taking our Turkeys to Thanksgiving dinner to hide with the adults.

I'd love to know if you try this with your fam, and what they think of it!
Monday, November 19, 2012
Thanksgiving Craft: Faux Stained Glass Turkey Art
We have had the most fun today! Watching Christmas movies and making a Thanksgiving craft... the recipe for a great day, in my opinion!
 This craft was super easy, super cheap, super cute, and super fun! With my older kiddos, it has to have at least a little bit of "cool" factor to have their buy-in. This craft fit the bill!
You will need: permanent markers, tinfoil, cardboard or cardstock, and some laminating film for a copier or printer. You can buy this at Walmart or office supply stores, or on Amazon. If you don't have this or want to buy it. just get a cheap report cover with the clear plastic front. Oh, and an image you'd like to color. You can download the one we used here.

Print your turkey onto the laminating film, or run it through the copier on the bypass setting. Please be sure you have the transparency film meant for your printer or copier. I believe there's a difference in inkjet/ laserjet/etc. You could also draw an image with black Sharpie onto the cheap transparency film, if you have those laying around. Or, if you are artsy enough (or can trace), find an image you like, stick the report cover on top, and trace it with a black permanent marker.

Color your turkey using permanent markers. We put a sheet of white paper on the clipboard behind our turkeys so we could see the colors better.

Cut a piece of tinfoil about 12 x 14 inches or so. Precise size doesn't matter, as long as it's a few inches bigger than your paper. Crumple the tinfoil, then uncrumple it. Cover your cardboard or cardstock with the tinfoil, kinda like you are wrapping a present. Tape the tinfoil down, shiny side out.
See the difference in the photo below? Same turkey, but the tinfoil is not crumpled. You must crumple the tinfoil to get the stained glass look.

Place your colored picture on the front of your cardstock and tape down the edges. Hang it somewhere where the light will catch it. Voila! Faux stained glass!
I am thinking these would also be gorgeous for Christmas as well.
 Disclaimer: My kiddos are old enough to handle Sharpies with a minimum of mess. Your mileage may vary if you have toddlers or pre-K-ers! I am not responsible for Sharpie masterpieces on clothes, body parts, campers, or the walls! (Although Magic erasers and writing over it with a dry erase marker seem to do the trick for me.)
What do YOU think? Got ideas to modify this craft? Did you try it with the report covers? How did it go?
What's your favorite holiday craft?


Print your turkey onto the laminating film, or run it through the copier on the bypass setting. Please be sure you have the transparency film meant for your printer or copier. I believe there's a difference in inkjet/ laserjet/etc. You could also draw an image with black Sharpie onto the cheap transparency film, if you have those laying around. Or, if you are artsy enough (or can trace), find an image you like, stick the report cover on top, and trace it with a black permanent marker.

Color your turkey using permanent markers. We put a sheet of white paper on the clipboard behind our turkeys so we could see the colors better.

Cut a piece of tinfoil about 12 x 14 inches or so. Precise size doesn't matter, as long as it's a few inches bigger than your paper. Crumple the tinfoil, then uncrumple it. Cover your cardboard or cardstock with the tinfoil, kinda like you are wrapping a present. Tape the tinfoil down, shiny side out.
See the difference in the photo below? Same turkey, but the tinfoil is not crumpled. You must crumple the tinfoil to get the stained glass look.

Place your colored picture on the front of your cardstock and tape down the edges. Hang it somewhere where the light will catch it. Voila! Faux stained glass!
I am thinking these would also be gorgeous for Christmas as well.

What do YOU think? Got ideas to modify this craft? Did you try it with the report covers? How did it go?
What's your favorite holiday craft?
Tuesday, November 13, 2012
Thanksgiving Camping Craft- Thankful Tree
November is a great time to work on practicing thankfulness with our children. It's something that we often forget to practice. But, no more! Take that, ungratefulness! We have found several ways to keep our happy little camper-hold focused on what blessings we have been given.
The Thankful Tree is probably my favorite. It involves nature, so I automatically love it! Plus, it's free, family -oriented, and fun! What more could you ask for in a craft?

You will need a fairly large tree branch- mine is probably 2-3 feet high and about 18 inches wide. There's a family activity in itself... Go on a walk in the woods and find the perfect branch.
You'll also need a vase, construction paper, and some beads or decorative stones to put in the vase.
Cut out some leaf shapes in fall colors. You can find templates here, here, or here. Or you can just cut them out by hand.
Place your branch into your vase. Fill the vase up with beads or stones to hold it in place. I just used a bag of random mixed beads in all different shapes, sizes, and colors. I think it turned out really pretty.

Distribute leaves to everyone in your family and have them write or draw things they are thankful for. I cut out about 20 leaves per person. We did 4-5 the first night, then I left the leaves in a bowl for anyone to grab whenever they feel the urge to be thankful. They've added on quite a few leaves every day. Some of the things they are thankful for have really surprised me!
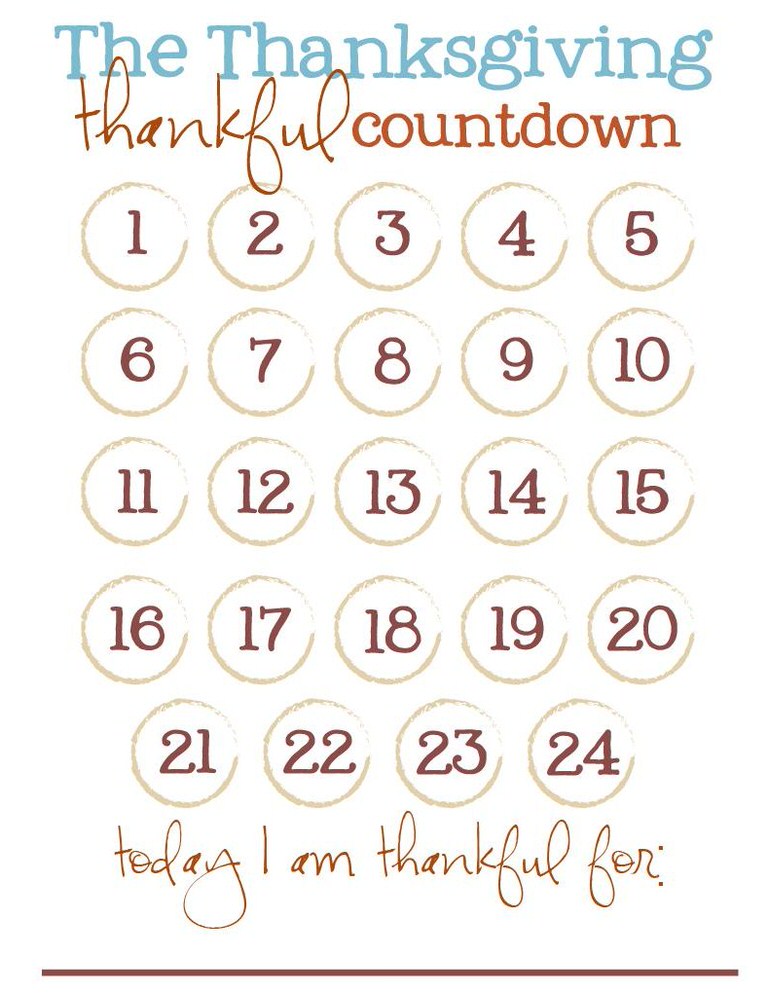
 Along with our thankful tree, we have a charming Thanksgiving Countdown printable from Tip Junkie and The Letter 4. I think it was intended for use a few years ago, when Thanksgiving was on the 24th (there are 24 circles to cross off), but I just whited out the 23rd and 24th circles. Stick it in a cheap dollar store frame, and Presto! Thanksgiving countdown. We use a dry erase marker to cross off every day, and we take turns writing what we are thankful for each day. Well, really, it's more of a race to be the first one to get to write on it each day! But we are sharing our gratitude, and that's A-OK with me!

I love both of these options because they're easy, frugal, and don't take up a lot of space. Oh, and they help us intentionally place our thoughts on what we DO have, rather than what we don't have.
What does your family do to maintain the spirit of Thanksgiving? We'd love for you to share!
The Thankful Tree is probably my favorite. It involves nature, so I automatically love it! Plus, it's free, family -oriented, and fun! What more could you ask for in a craft?

You will need a fairly large tree branch- mine is probably 2-3 feet high and about 18 inches wide. There's a family activity in itself... Go on a walk in the woods and find the perfect branch.
You'll also need a vase, construction paper, and some beads or decorative stones to put in the vase.
Cut out some leaf shapes in fall colors. You can find templates here, here, or here. Or you can just cut them out by hand.
Place your branch into your vase. Fill the vase up with beads or stones to hold it in place. I just used a bag of random mixed beads in all different shapes, sizes, and colors. I think it turned out really pretty.

Distribute leaves to everyone in your family and have them write or draw things they are thankful for. I cut out about 20 leaves per person. We did 4-5 the first night, then I left the leaves in a bowl for anyone to grab whenever they feel the urge to be thankful. They've added on quite a few leaves every day. Some of the things they are thankful for have really surprised me!


I love both of these options because they're easy, frugal, and don't take up a lot of space. Oh, and they help us intentionally place our thoughts on what we DO have, rather than what we don't have.
What does your family do to maintain the spirit of Thanksgiving? We'd love for you to share!
Monday, November 12, 2012
Top ten reasons why fall camping is unbe-leave-able:
There’s something wonderful about camping in the fall. It’s
like a picnic for your senses!
Top ten fifteen reasons why fall camping is unbe-leave-able:
- The leaves are beautiful to look at. Gotta love fall foliage!
- You hear them crunching underfoot as you walk.
- You smell the campfire... mmmh!
- It’s actually cool enough to enjoy said campfire.
- Can't you just feel the cool, crisp air? You feel more alive as soon as you step out the door!
- You taste all the yummy fall dishes, like chili, crockpot meals, or soup.
- You actually want to be outside. It's not hot enough to melt crayons.
- Two words: Leaf Piles
- You can camp at different campgrounds/ campsites in the fall. You pick a campground not for its proximity to water, but for its view or its leaves.
- Campgrounds are generally less crowded. We <3 meeting new people when we camp, but it's nice to know the campgrounds probably won't fill up before we can get there. And, sometimes, you get lower rates for the off-season!
- The days are still relatively warm. You'll probably have a lucky day here and there where you can still wear shorts and flip flops. Aaah, flip flops....
- You get to pull out those sweaters, fleece pullovers, and hoodies.
- Snuggling. 'Nuff said. Zip those sleeping bags together and stay warm!
- What better time to drink hot cocoa than on a fall camping trip? Or spiced apple cider? Yummm!
- There's nothing to do! No, that's not a complaint. There's no swimming, hustle & bustle, or busy-ness. Fall is a time to slow down and relax....

So, what are you waiting for? Go camping!
What is roadschooling?
What is roadschooling?
Roadschooling is homeschooling, on the road. It means taking
where you are, at any moment in time, and turning that into a learning
experience. Roadschooling means recognizing that life is all about learning.
It’s taking the tiny, teachable moments, and turning them into life lessons.

Find a cool piece of fungus? Research it! Pick it. Experiment with it!
A fan breaks? Fix it.
Studying weather, rocks, erosion, weathering, life cycles, etc.? Go outside and
look for examples!
Find hawk/owl pellets containing a skeleton? Put it back together and figure out what it is.
Are you traveling in an area affected by a drought? Discuss
what a drought is and what signs you see of the drought. How does it affect the
lives of those in the area? Repeat with tornado, flood, hurricane, etc.
Need to go shopping? Teach your kids the life skill
of reading labels and comparing prices.
Traveling to one of America’s great
wonders, like the Grand Canyon? How was it formed? Can you see the layers of
sedimentary rock?
Need to get gas? How many miles per gallon does your vehicle
get? How many more does it get when you’re not towing your camper behind?
Cooking dinner? Teach the kiddos to help. Incorporate fractions, measurement,
and heat sources.
Traveling through Gettysburg? Learn about the Civil War.
Roadschooling is meeting your children’s instructional needs
in the way that’s best for them. It can be as structured or as unstructured as
you want it to be. It can follow a traditional homeschool day, with set
subjects at specific times. It can be more like unschooling, where children
follow their own interests and learn in a more unstructured manner. Repeat this
with me: there’s no right or wrong!
Wheat Free, Dairy Free, Egg Free Snickerdoodle Pancakes
Wheat Free, Dairy Free, Egg Free Pancakes
I have finally found the perfect recipe for allergy friendly
pancakes. Believe it or not, it is possible to make a milk free, wheat free, egg free pancake that actually tastes great! And it only uses a few, fairly normal ingredients, so they’re easy to
whip up while camping. I actually mix up several batches of the dry mix at a
time and store until I’m ready to use. Then all I have to do is add milk, oil,
and applesauce!
Hunter is allergic to
(let me get out my fingers here) milk, wheat, corn, soy, eggs, and rice.
Finding a pancake recipe without wheat, rice, or eggs has been a nightmare!
But, after much trial and error, we have
done it! It’s loosely based on Cybele Pascal’s recipe for apple pancakes… but
these are more of a snickerdoodle pancake!

You will need :
1 cup oat flour (by far, the cheapest of the gluten-free
flours- just pour oats, as in oatmeal out of a canister, into your blender or
food processor until it resembles a fine flour)
½ tsp salt
3 tsp double acting baking powder
1 tsp cinnamon (Modify this more or less due to your own
tastes
2 T sugar (Again, you can modify according to taste. )
1 cup safe milk (almond, soy, coconut, oat)
2 T oil
¼ cup applesauce (This is the egg substitute. You cannot
really taste it.)
Mix dry ingredients together, then add wet. Cook on a
griddle, or pour into a buttered pan and make baked pancakes. (Trust me, make the baked pancakes!) You can also
double the recipe, add a little more sugar and cinnamon, pour into a pan, and you have snickerdoodle cake!
Linking up to Allergy Friendly Thanksgiving. This will most likely be one of Hunter's desserts for Turkey Day, in cake form.
The easiest way to make pancakes ever- Baked Pancakes
The easiest way to make pancakes ever. This will change your
life. Seriously!
We love pancakes for breakfast (or dinner). Having a nice
breakfast is one of the things camping is all about. But camping is also about
relaxation, so sometimes it’s hard to force myself to have the long, luxurious,
yummy breakfast I know we’ll all enjoy because making pancakes is a little
time-consuming. We take our electric griddle, so it’s not hard to do
pancakes…but some days I just wanna be lazy. You know?
And with Hunter having
allergies to wheat, dairy, and eggs, his pancakes are extra-special! Having
pancakes usually means at least an hour in the kitchen. I have to cook Hunter’s
first so as not to contaminate the griddle, but that means his are usually cold
and have to be microwaved before we can eat. In other words pancakes= yummy
headache!
But, NO MORE! Do you hear me, griddle? No more. You are
officially retired from pancake making!
Thanks to Lynn’s Kitchen Adventures, I tried this tip last
night. I can honestly say, I will never make another round pancake again! And
the best part was, I had two pans going in the oven at once. All the pancakes
were ready at the same time! Do you know how long that’s been?
All you do is make your normal pancake batter… whatever
special boxed mix recipe your heart desires.
Pour your batter into a buttered 13x9 inch pan, or even a
buttered cookie sheet (just be sure it has edges… they don’t have to be deep).
Whatever you have in your camper. Your size pan will really depend on your
amount of batter. Last night, I made about 3.5 cups of batter in a 13x9 inch
pan. Next time, I will divide that into two 13 x 9 inch pans. The pancakes were
great, but very thick. Hunter’s mix only made about 2 cups, and I poured his
into an 8 x 10 inch pan. I could have probably done his in a 13 x 9. Lynne’s
rule of thumb was 2 cups mix to one 13 x 9 pan.
***UPDATE*** I tried this on well-oiled cookie sheets last night. That is THE. WAY. TO. GO! 3.5 cups of batter worked perfectly on 2 large cookie sheets. These pancakes were the perfect combo of moist and crispy. They were truly like real pancakes in thickness. Delish!
***UPDATE*** I tried this on well-oiled cookie sheets last night. That is THE. WAY. TO. GO! 3.5 cups of batter worked perfectly on 2 large cookie sheets. These pancakes were the perfect combo of moist and crispy. They were truly like real pancakes in thickness. Delish!
Bake at 375 for about 10 – 15 minutes, depending on your
oven. You’ll know they’re done just like a cake (which is, well, kinda what
you’re making… a Pancake cake!). When your toothpick or knife pulls out clean,
it’s done.
 |
| Yes, I know. They don't look beautiful. But they taste good. And that's what matters! Gluten free pancakes are never pretty, right? These are in a 13 x 9 pan. |
This last step is important, IF you care how your pancakes
look. I mush mine anyway, so I truly didn’t care. If you want pretty pancakes,
without ragged edges, let it cool before you cut it. If you’ve got hungry kiddos
salivating beside you, go ahead and cut it!
I have to say, these turned out SPECTACULAR! Especially Hunter’s. Wheat /egg/dairy free pancakes have always come out looking misshapen and funky. These were gorgeous!
They actually turned out so well, I will
probably double the recipe and let this be my new allergy-friendly cake recipe
from now on.
Friday, November 2, 2012
After Halloween Frugal Christmas Gift Idea
My aunt did this a few years ago, and I was amazed. Everybody hits Walmart, Target, the grocery stores, etc. for post-Halloween clearance candy and costumes. That's fantastic. Really. But sometimes, you get what you pay for when it comes to cheap costumes.
 But, not always. Instead of heading to a discount store, head to Khols (or another comparable department store). These places often carry costumes as well, but they are generally very well-made and quite pricey. That is, until after Halloween.
My aunt picked up about 10-12 extremely nice Halloween costumes for the kiddos for between $3-$6 each at Khols. She packaged them for Christmas as dress-up costumes. As a nice bonus, they also had Halloween costumes for years!

My aunt picked up about 10-12 extremely nice Halloween costumes for the kiddos for between $3-$6 each at Khols. She packaged them for Christmas as dress-up costumes. As a nice bonus, they also had Halloween costumes for years!
How to Make Glow Sticks Brighter
We know glow sticks are a camping must have. Sometimes they're not that bright. Especially if you buy them 15 for $1 like I do. Want some super bright glow sticks?
 Store 'em in the freezer.

Now THIS is the COOLEST Non Last Minute Homemade Halloween Costume ever...
Ok, I still claim the title for the coolest last minute Halloween costume ever. Plus, I'm totally thinking of doing this again one night for all of us, when we're camping. Just for funsies.
But you must, I repeat MUST head on over to http://kitchenfunwithmy3sons.blogspot.com/2012/10/our-2012-homemade-halloween.html and check out their camper costume. Please! It totally rocks!
But you must, I repeat MUST head on over to http://kitchenfunwithmy3sons.blogspot.com/2012/10/our-2012-homemade-halloween.html and check out their camper costume. Please! It totally rocks!
Wednesday, October 31, 2012
The Coolest Last Minute Halloween Costume EVER - Glow Stick Man
My little man (you know, the one that's not so little anymore, the one who was simply too cool to trick or treat this year) decided TODAY that he wanted to trick or treat tonight after all!

So, a-Googling I went. There's a lot of last minute costume ideas out there, but not a lot of cool ones. Yeah, he could be a hobo or a football player, but... Eeh.
I stumbled across this idea, which,of
course you can purchase online...but A, that's more than I wanted to spend, and B, uh, hello, last minute?
It's called a Glow man (we're PC here... Or Woman)! And OMG, how easy ! All you need is black pants, shirt, stocking cap, and glow sticks.
 I hot glued the ends and middle of the glow sticks to the shirt and pants in a stick man design. Be sure to do front and back so you can see it from both sides. Then I had him put the cap on and made a circle out of three glow sticks and hot glued the top of the circle to the hat. You want the circle to frame the face like a stick person face.
That's it! Took maybe 20 minutes to hot glue everything together. I will warn you... Activate the glow sticks BEFORE you glue. Before. I activated after, and had to pull off about 5 glow sticks that were duds.
We used 48 glow sticks total, for a cost of about $5. I actually spent $8 for 80 glowsticks, but we had a lot leftover.
The clothes we used were play clothes, so I'm gonna call them free!
 The picture of this costume really don't do it justice. This baby is sooooo cool looking! And did I mention cheap and easy?

So, a-Googling I went. There's a lot of last minute costume ideas out there, but not a lot of cool ones. Yeah, he could be a hobo or a football player, but... Eeh.
I stumbled across this idea, which,of
course you can purchase online...but A, that's more than I wanted to spend, and B, uh, hello, last minute?
It's called a Glow man (we're PC here... Or Woman)! And OMG, how easy ! All you need is black pants, shirt, stocking cap, and glow sticks.
That's it! Took maybe 20 minutes to hot glue everything together. I will warn you... Activate the glow sticks BEFORE you glue. Before. I activated after, and had to pull off about 5 glow sticks that were duds.
We used 48 glow sticks total, for a cost of about $5. I actually spent $8 for 80 glowsticks, but we had a lot leftover.
The clothes we used were play clothes, so I'm gonna call them free!
 The picture of this costume really don't do it justice. This baby is sooooo cool looking! And did I mention cheap and easy?
Tuesday, October 30, 2012
Halloween/ Fall Festival Games: Spooky Bowling
Need an awesome idea for your fall festival, Halloween party, harvest fair, or just for around the house? Need another reason to show your kiddos how totally awesome you are?
Thinking outside the box is always good... especially when it comes to anything kid-related. Unless you're a fan of "I'm bored", "This is bor-ing!", or any variation thereof...
And boring is especially no good when it comes to other people's kids...you know, the ones who don't have to act interested in your wacky ideas that you promise will be fun, especially if they just wait three hours for the crayons to melt. Nobody wants to host the fall festival game that none of the kiddos are interested in playing. Anyone else have nightmares about droves of children at the fall festival, happily playing every game there, except yours? Nah? Just me?

Well, Spooky Bowling is guaranteed not to disappoint. If the line of kids at our Fall Festival was any indication, this game rocks! Don't be fooled by the simplicity....we ran out of prizes, ok?
First of all, you need to go to CVS, Dollar Tree, or somewhere else you can buy these Luxury Wafers in a can. They come in chocolate and vanilla flavors for only $1 per can. (Please don't buy them from Amazon- they are way cheaper at the store!). You will need 10 cans. Darn! Must eat cookies!
You will also need some orange and black paper, glue/ glue gun, Halloween themed stickers, and a ball. We tried a variety of balls, from tennis balls, to Sky balls to the cheap 79 cent big rubber bouncy ball. This is one instance where cheap is better.
Step 1: Eat the cookies! Discard the top and wrappers.
Step 2: Cut your paper to fit around the can.
Step 3: Glue the paper to the cans. I used a glue gun. You choose!
Step 4: Decorate the cans with stickers. Don't you just love the candy corn stickers??
Step 5: Arrange the cans on a level surface in a pyramid shape. (Our surface was paved, so we used chalk to make little Xs so we could easily set the cans back up)
Step 6: This step is totally optional, but will make your game even cooler! Cover your ball (or a variety of balls) with Candy Corn or Spider Duck Tape. If you want to use ghosts or pumpkins, that's okay too! We just tore small strips of tape and covered the balls.
Step 7: Decide how you will award prizes. If you're playing at home, you can skip this step.
Step 8: Mark off lines for different age kids to stand behind as they bowl. If your kiddos will be all relatively the same age, you can skip this step.
Get ready to have some bowl-a-rific fun!
Need another Halloween game? Try Halloween Luck!
 Linking up at

Thinking outside the box is always good... especially when it comes to anything kid-related. Unless you're a fan of "I'm bored", "This is bor-ing!", or any variation thereof...
And boring is especially no good when it comes to other people's kids...you know, the ones who don't have to act interested in your wacky ideas that you promise will be fun, especially if they just wait three hours for the crayons to melt. Nobody wants to host the fall festival game that none of the kiddos are interested in playing. Anyone else have nightmares about droves of children at the fall festival, happily playing every game there, except yours? Nah? Just me?

Well, Spooky Bowling is guaranteed not to disappoint. If the line of kids at our Fall Festival was any indication, this game rocks! Don't be fooled by the simplicity....we ran out of prizes, ok?
First of all, you need to go to CVS, Dollar Tree, or somewhere else you can buy these Luxury Wafers in a can. They come in chocolate and vanilla flavors for only $1 per can. (Please don't buy them from Amazon- they are way cheaper at the store!). You will need 10 cans. Darn! Must eat cookies!
You will also need some orange and black paper, glue/ glue gun, Halloween themed stickers, and a ball. We tried a variety of balls, from tennis balls, to Sky balls to the cheap 79 cent big rubber bouncy ball. This is one instance where cheap is better.
Step 1: Eat the cookies! Discard the top and wrappers.
Step 2: Cut your paper to fit around the can.
Step 3: Glue the paper to the cans. I used a glue gun. You choose!
Step 4: Decorate the cans with stickers. Don't you just love the candy corn stickers??
Step 5: Arrange the cans on a level surface in a pyramid shape. (Our surface was paved, so we used chalk to make little Xs so we could easily set the cans back up)
Step 6: This step is totally optional, but will make your game even cooler! Cover your ball (or a variety of balls) with Candy Corn or Spider Duck Tape. If you want to use ghosts or pumpkins, that's okay too! We just tore small strips of tape and covered the balls.
 |
| Have you ever seen anything cuter than a Candy Corn ball??? |
- My original plan (which would work well for a family game, classroom, or other setting with a relatively small number of kids) was to place a small prize into each can and the kiddos earned the prize that was in each can then knocked over. You knock over 7 cans, you win 7 prizes.
- Since we had so many kiddos at our festival, we decided to be a little more moderate. We made a sign indicating 1-3 pins = 1 prize, 4-7 pins = 2 prizes, 8-10 pins = 3 prizes.
- After the game was such a hit, we moved to Plan C: "Yay! You knocked down ___ pins! Here's your (1) prize!"
Step 8: Mark off lines for different age kids to stand behind as they bowl. If your kiddos will be all relatively the same age, you can skip this step.
Get ready to have some bowl-a-rific fun!
Need another Halloween game? Try Halloween Luck!
Linking up at
Subscribe to:
Posts (Atom)